Hey girl, remember those lazy summer afternoons when you’d wander through your garden and think, “I need some garden rock painting ideas easy enough for a total beginner like me”? I totally do – my backyard was looking so plain last spring, and I was itching for a cheap, fun project to jazz it up. These little painted rocks turned into my obsession real quick.
I put this together because I know how overwhelming Pinterest can feel with all the fancy stuff – but trust me, I’ve messed up a few rocks myself (paint everywhere, whoops). Last weekend, I grabbed some dollar-store acrylics and smooth stones from the creek near my house, and boom – instant garden magic without spending a fortune. It’s the perfect low-key craft for when you want to feel creative but not stressed.
Stick with me, and you’ll get 12 super easy garden rock painting ideas that anyone can nail, plus my real-talk tips to make them last in your outdoor space. You’ll be hooked by the third one, promise.
12 Easy Garden Rock Painting Ideas You’ll Wish You Tried Sooner
Mini Fairy Door Rock
This tiny door painted on a rock is pure whimsy – imagine fairies popping in for tea in your garden. I tried it first on a flat river stone, using just white and brown acrylics for the frame, and a dot of yellow for the light inside. So easy, took me 20 minutes, and now it’s tucked under my hostas where the kids pretend it’s real. You gotta hide these around so finding them feels like treasure hunting.
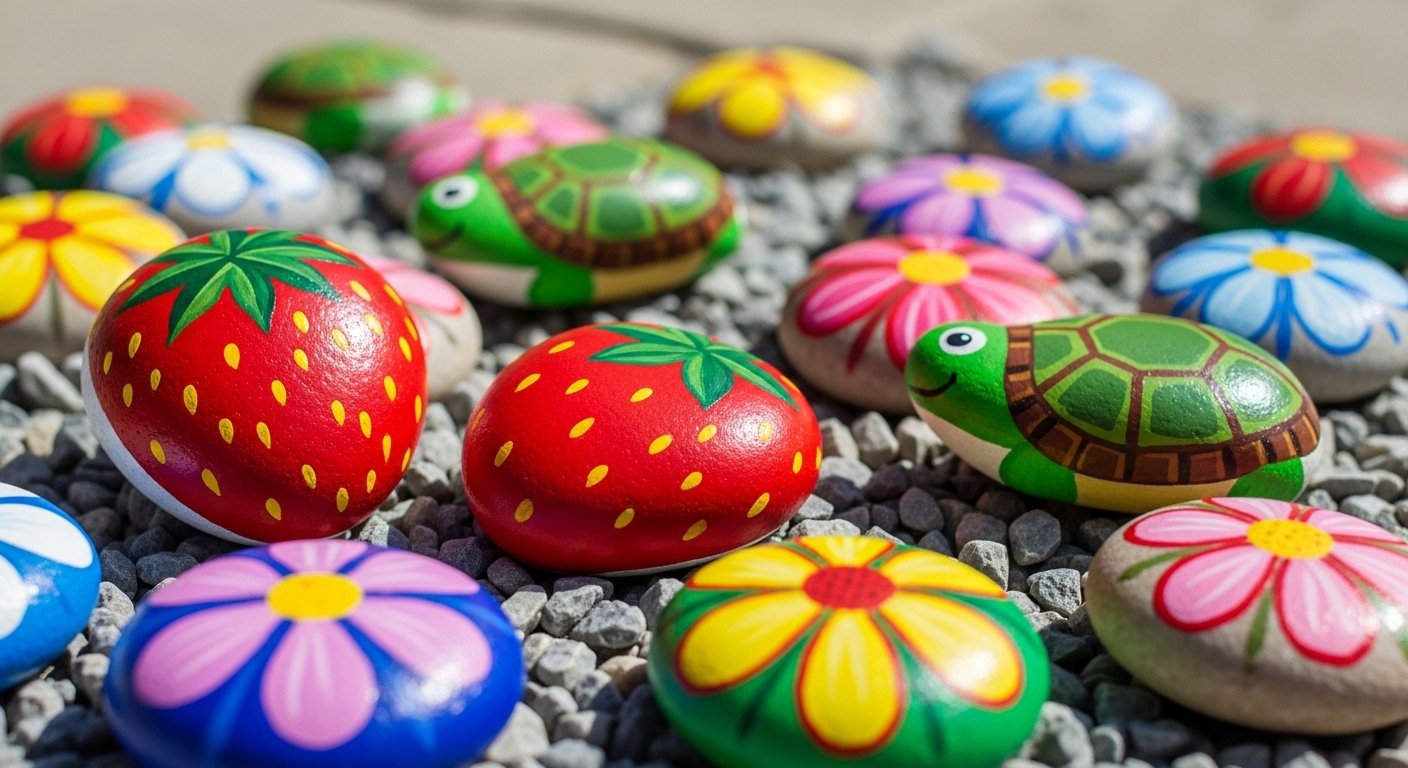
Cute Turtle Pal
Look at this adorable turtle – green shell, happy eyes, ready to chill in your flower beds. I painted one during a rainy afternoon (perfect indoor craft!), starting with a base coat and freehand dots for the pattern. My neighbor saw it and asked for one for her pond – instant friendship booster. Drop these by ponds or paths; they make everything cuter.
Flower Power Quartet
Four sweet flower rocks that scream spring vibes – pinks, yellows, simple petals. Grouped together, they look like a mini bouquet on your patio table. I scattered mine along the edge of my veggie garden, and they survived a whole summer of sun and rain. Pro tip: mix sizes for that natural cluster feel.
Sunglass Smiley Face
Yellow grin with cool shades and leafy friends – total beachy garden energy. I laughed so hard painting the tiny sunglasses; mine came out a bit wonky, but that’s the charm. Place it front and center where you sip coffee – it’ll make you smile every morning, no joke.
Glowing Bee Buddy
Black rock with neon green glow and a buzzy bee – pops at night under garden lights. I used glow-in-the-dark paint for mine (game-changer), and it lit up my path like magic. My cat bats at it thinking it’s alive – endless entertainment. Perfect for pollinator lovers like you.
Floral Egg Surprise
This egg-shaped rock with grass and blooms feels like an Easter hideaway. Honestly, I painted it thinking of my niece’s basket, but it ended up in my herb garden looking right at home. So forgiving for beginners – blobs turn into petals easy. Tuck it in dirt for that nestled vibe.
Strawberry House Scene
Rocks bursting with strawberries and a cozy house in the mix – farm-fresh cute. I got carried away adding tiny windows; took longer than planned but worth it. My strawberry patch needed this cheer, and now picking berries feels like a storybook. You’ll love how it draws the eye.
Cheeky Potted Plant
Hand-painted pot with blush cheeks – like your plant has personality. Quick one for me: green leaves, pink face, done. I lined a few along my windowsill before moving them outside – they make great plant markers too. Adorable imperfection included.
Strawberry Daisy Cluster
Strawberries surrounded by daisies and leaves – fruity flower overload. Painted these with my bestie over wine; hers smudged, mine too – we called them “rustic.” Cluster them by real plants for that blended garden magic. Obsessed.
Dandelion Grass Gems
Dandelions puffing on rocks, right in the grass – wish-granting whimsy. I collected these after a walk, painted fluffy seeds with a toothpick for detail. One blew away in wind (lesson learned: seal ’em), but the rest brighten my lawn. Nature’s perfect frame.
Cucumber Pea Faces
Cucumber slice with peapod faces peeking out – veggie cartoon cuteness. This one cracked me up; the tiny grins took forever but so fun. Great for kitchen herb spots or veggie gardens – my basil loves the company. Veggie puns all day.
Neon Bee Glow Again
Another glowing bee rock because why not double the buzz? Same black base, green shine – I made a pair for symmetry in my pollinator bed. Kids in the neighborhood hunt for them at dusk now. Can’t get enough of this glowy goodness.
How to Actually Make This Work For You
Okay, real talk – start with smooth, clean rocks from your yard or a dollar store bag; wash ’em good and let dry so paint sticks like glue. Grab basic acrylic paints (cheap sets at craft stores work fine) and thin brushes or even Q-tips for dots – no need for fancy tools, I promise. Seal everything with outdoor Mod Podge or spray after it dries a day; that’s what saved mine from last summer’s downpours. Layer in a shady spot first to test colors, and group your finished rocks by theme – flowers together, critters separate – for that pro garden look without the effort. Oh, and if it rains mid-project, just laugh it off like I did and start fresh; imperfection’s part of the fun.
What paints work best for garden rocks?
Acrylics are your go-to – they’re cheap, vibrant, and dry fast. I stick to outdoor-rated ones for weatherproofing, but regular craft acrylics hold up fine with a good sealant. Avoid oils; they’re messy for beginners.
Do I need special rocks?
Nope, any smooth, flat stones from rivers or stores do. Bigger ones for details, smaller for clusters. I soak mine in soapy water overnight to remove dirt – huge difference.
How long do painted rocks last outside?
With sealant, easily a year or two through sun and rain. Mine from last spring still look fresh; re-seal annually if faded. Skip super sunny spots to prevent quick bleaching.
Beginner mistakes to avoid?
Don’t skip priming or sealing – peeling happens fast otherwise. Paint thin layers to dodge drips, and practice on paper first. My first turtle was a blob, but now I’m pro.
Leave a Reply